AutoDLA WEB
You can connect AutoDLA with the web framework of your choosing to automatically build AutoDLA WEB, a robust Data Admin Panel
Setup
For this example we are going to use FastAPI
And the next schema:
from autodla import Object, primary_key
from autodla.dbs import PostgresDB, MemoryDB

class User(Object):
    id: primary_key = primary_key.auto_increment()
    name: str
    age: int

class Group(Object):
    id: primary_key = primary_key.auto_increment()
    group_name: str
    participants: list[User]

# MemoryDB works only in-memory. PostgresDB keeps data in SQLite and
# synchronizes with PostgreSQL.
db = MemoryDB()  # or PostgresDB()
db.attach([User, Group])
users = []
for i in range(2):
    users.append(User.new(
        name=DataGenerator.name(),
        age=DataGenerator.age()
    ))
group = Group.new(
    group_name='Group 1',
    participants=users
)
Connection
To connect AutoDLA with the web framework, you just need to use the function connnect_db:
# default fastAPI app creation
from fastapi import FastAPI
app = FastAPI()

# connect it
from autodla.connectors.fastapi import connect_db
connnect_db(app, db)
Usage
Endpoints
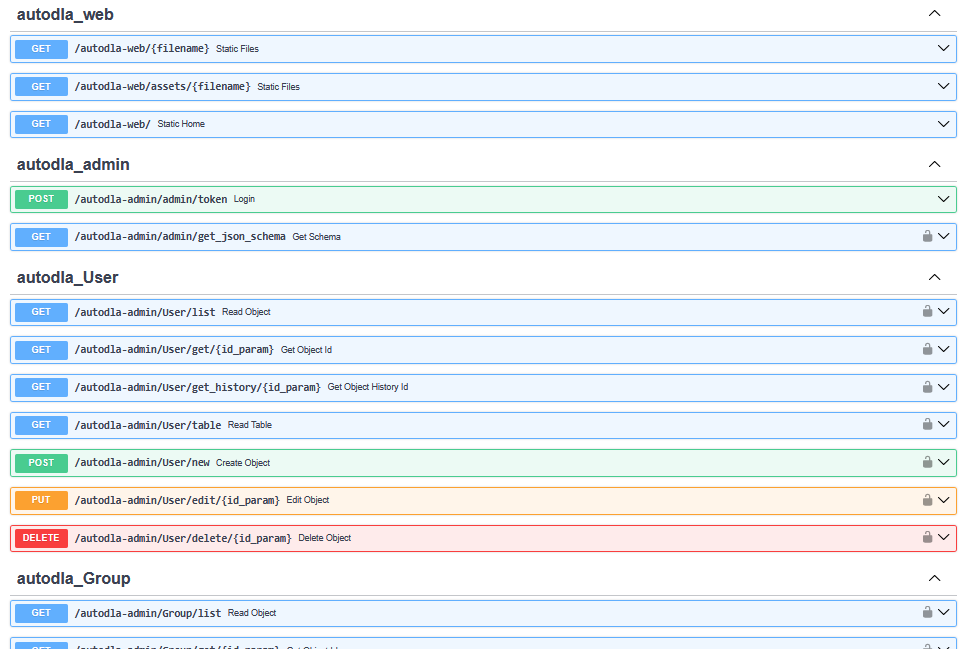
If you go to localhost:8000/docs (the default FastAPI documentation endpoint) you'll see that AutoDLA automatically generated CRUD endpoints for each model:
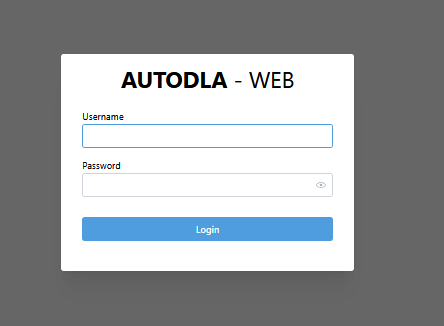
These endpoints are secured using OAuth2. by default the user and pasword are as follows:
you can setup this with changing the respective enviroment variablesAdmin Panel
If you enter to localhost:8000/autodla-web you are going to see the admin authentication panel, use the previously mentioned credentials to enter
Once you are authenticated, you'll have 2 tabs to work with:
Schema
This is the landing tab for the tool, in here you can see a canvas with the visualization of the defined schemas and their relationships

Objects
This is your working tab, inside there is a sub-tab for each Model

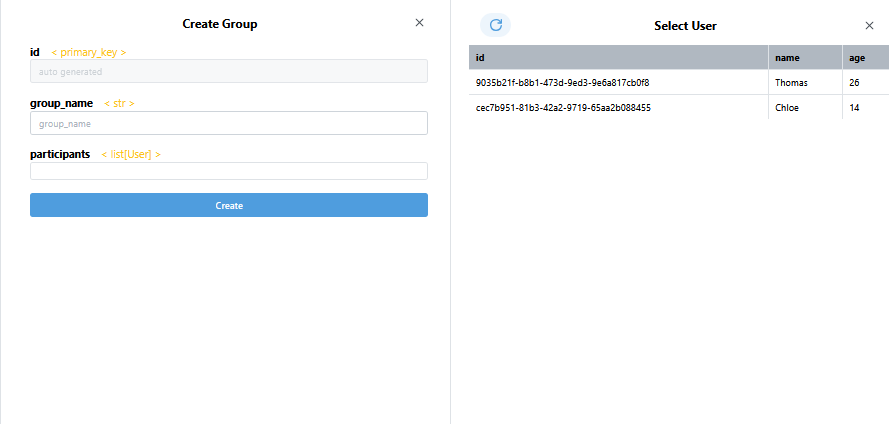
Let's work with Group to show the tool capabilities.
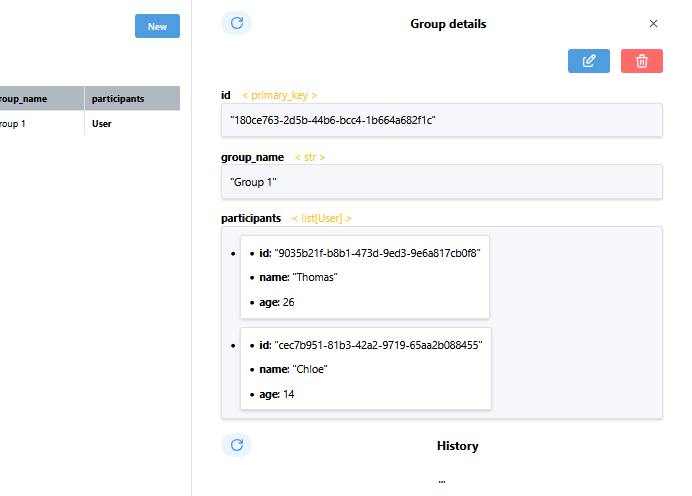
When you open the model sub-tab you can see a table, this contains all currently active Objects
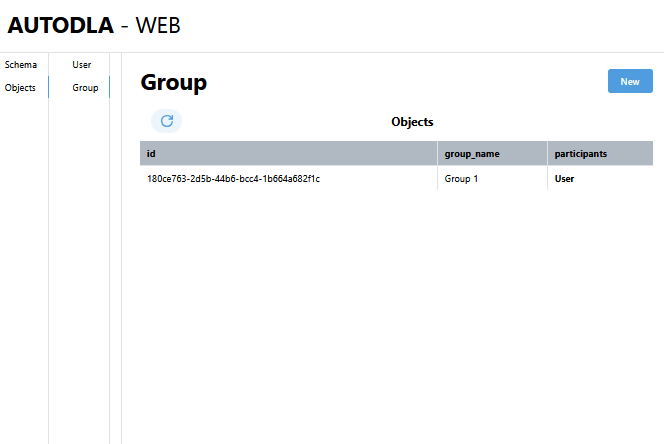
If you click on a row of the table, you open the details specific object, inside the object details you can modify it or delete it, apart of seeing the complete history of it.
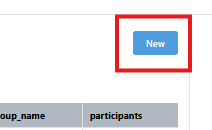
Creating Objects
If you click the New button, a new window will be opened, allowing you to create a new instance of the Object you selected
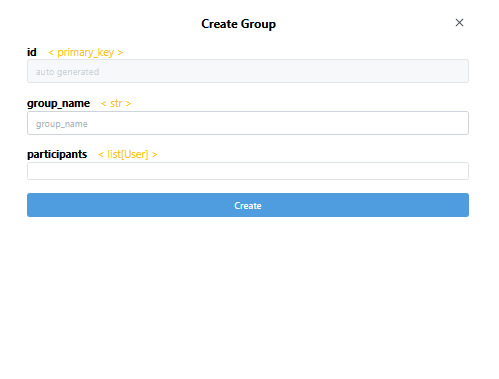
The update window (accessed via the object details) is similar in structure to this window, the only difference being that the data is automatically selected with the last available data
Nested Selection
If you need to select a different object for a field (in this example case, you need to select a User for the participants field), you can click the input field and a selection window for the required object is going to be opened, with a list of currently active objects, once you select one, its going to automatically insert it into the input field.